How to get started with your Confirmo account
Congratulations! You have successfully created your account. Let’s dive into the action steps you can take to leverage Confirmo to the maximum!
Verify your account
First, to maximize account security and comply with applicable law, we require that all our clients verify their account. To ensure that you can test your implementation before going live, unverified accounts can create payable invoices, but cannot withdraw from balances. Confirmo’s verification is easy and swift – read more about it here.
Fill out your profile
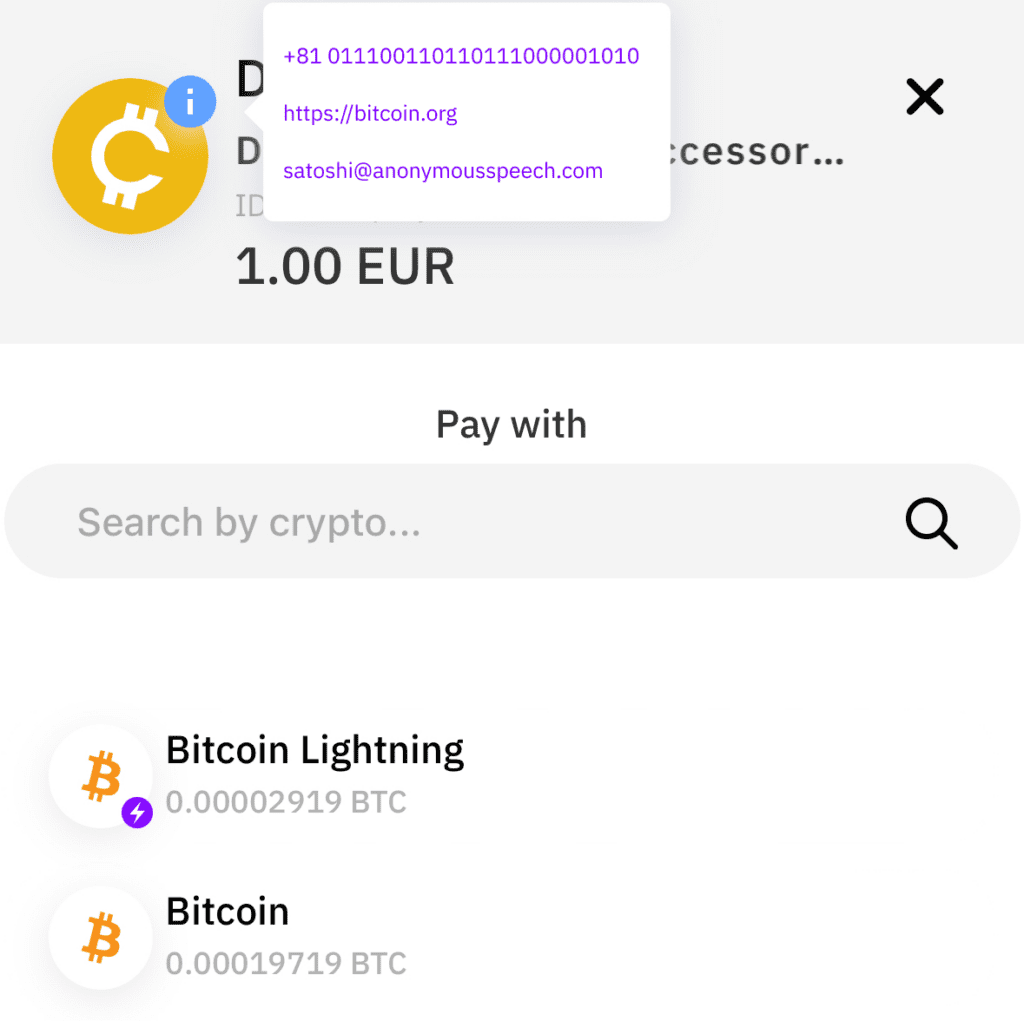
When a customer views your Confirmo crypto invoice, they are shown the key information for a successful payment. This includes the name of the product, the amount to be paid, the list of supported cryptocurrencies, and more.

Your Public profile is displayed when the customer hovers over your uploaded logo in the upper left corner of the invoice. This creates an extra layer of trust and makes the payment easier, because the customer can quickly check who they are paying, and who to contact in case of problems with the order. Read the complete guide to completing your Confirmo Public profile here.
Set up your public profile in the dashboard here.
Set up 2FA
We take account security very seriously. That is why, among other things, we offer two-factor authentication on login. It is as simple as installing Google Authenticator on a mobile device and pairing it with your Confirmo account in Security settings.
Confirmo offers a suite of tools to maximize the security of your account. Read about them in the dedicated guide, and learn about general security best practices on our blog.
Create an invoice
Invoices are an essential tool to conducting cryptocurrency payments. Confirmo’s solutions enable your business to generate advanced, unique QR-code invoices for receiving payments in cryptocurrencies no matter your business type.
You can test Confirmo without any integration. Two of our solutions can be used to receive crypto payments right away.
- The easiest way is to generate a payment button and place the code on your website. You can also try a payment from the dashboard.
- Alternatively, you can create a manual payment request to send an email with a link that creates an email invoice when opened.
If you want to customize the creation of crypto invoices on your website, read our API documentation that includes sample code in various programming languages with mock server testing. Visit out Brand Assets for payment buttons for your checkout flow.
You can optimize invoice behavior in invoice settings. Read our comprehensive guide on why and how you should personalize invoices here.
Then, try paying it!
Once you have set up your account and created a payment method, you can test the flow by making a payment to your own invoice. This will help you get a good idea of what your end-users will see so you can make final adjustments before going live.
We recommend paying from crypto wallets that pay immediately, such as dedicated mobile wallet apps – do not pay from exchange wallets, as these often batch outgoing payments. This can lead to delays in transactions, causing your invoices to expire.
Set up notifications
Being up to date with account and payments activity is crucial. You can choose to receive email notifications about invoice exceptions, invoice payments, or URL failures here.
Set up withdrawals
Add a bank account or cryptocurrency wallet so you can withdraw balances from your Confirmo account. Set your preferences to suit your business needs.
Learn more about withdrawing from your Confirmo account in the dedicated guide here.
Create a Payout
If you want to make withdrawals in crypto from your Confirmo account, you can use Payouts. They offer a flexible, manual option for immediate cryptocurrency withdrawals. They can be further tailored using Confirmo’s API for:
- Mass Payouts: Bulk transactions to numerous addresses at once.
- Recurrent Payouts: Regularly scheduled transfers.
We have covered the ins and outs of Payouts in the dedicated guide here.
Add more users
As a final step, you can add more users to your Confirmo account with different rights. This is useful in companies where different people need to access the account on a need-to-know basis.
There are four types of access to a Confirmo account. The person who created the account has an Administrator login, and can create any number of the three types of sub-accounts for different people accessing the Confirmo account. You can learn every detail about sub-accounts in the complete guide here.
By setting these up and providing them to the relevant people, you can be sure that no one will be able to change any settings or do anything that they are not authorized to. To create a new user account, go to the Settings – Users menu in your dashboard.
Conclusion
We hope this Action steps overview helped you better understand everything you can do with your Confirmo account. We are constantly adding new features, so make sure you stay tuned! Read more about Confirmo on our Blog and Wiki, and follow us on Twitter and LinkedIn!