![]()
How to create an email invoice
Crypto invoices are the bread-and-butter functionality for creating manual payment requests as a business. Let’s take a look at the specifics of creating one with Confirmo! It’s super simple.
Email crypto invoices with Confirmo
Email invoices are best suited for those times when you don’t need to receive the funds immediately. You simply create the payment request and send it via e-mail to a customer. It will patiently wait in the recipient’s inbox until opened.
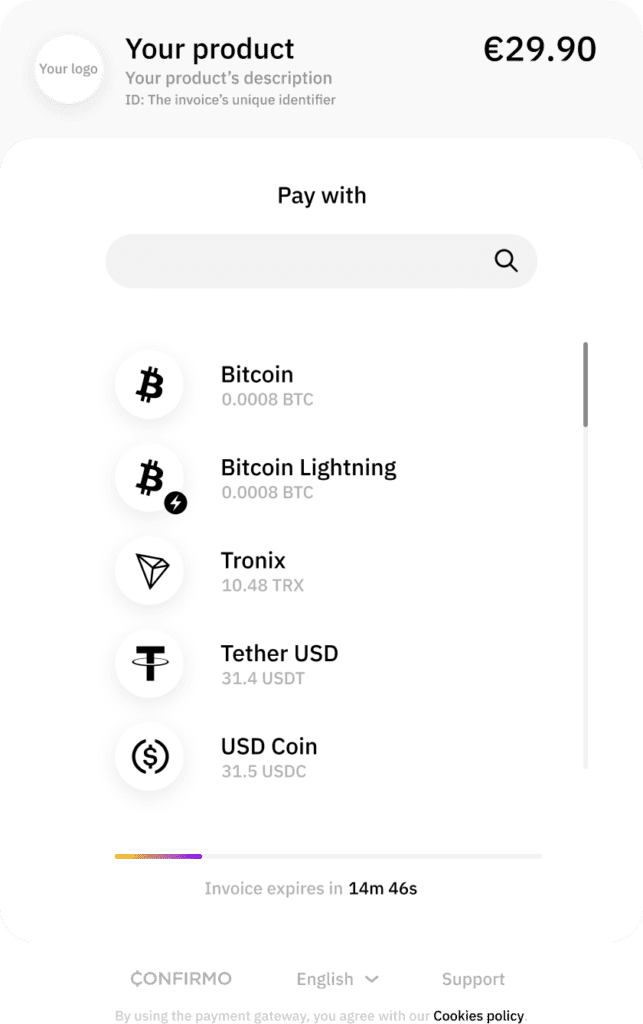
After clicking on the View invoice and pay now button, the recipient is redirected to the actual invoice page and prompted to complete the payment.
The invoice is generated only after they have clicked the button – this means that the actual invoice is generated once the recipient opens the email, as the link does not expire. However, Confirmo invoices have a default expiration time of 15 minutes. Read more about setting invoice expiration times here.
To create an email invoice, navigate to Payment tools – Email invoices – Create email invoice.
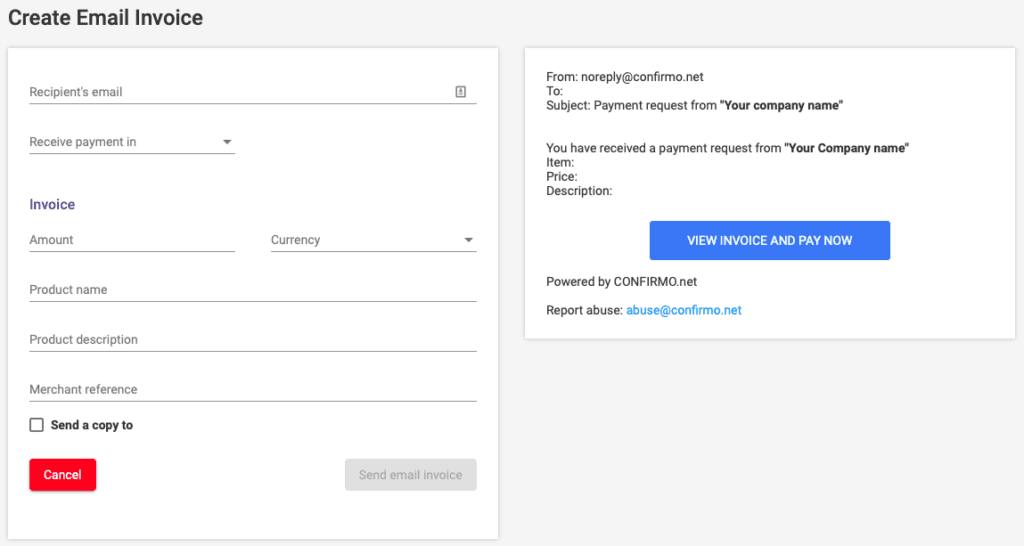
Setting up the email invoice
You will be prompted to input the client’s email address, the cryptocurrency you want the invoice to be paid in (or you can leave it up to the payee), and, of course, the currency you want to receive to your Confirmo balance. You will then specify what will be displayed on the invoice.
Set the amount to be paid, currency to be received, the product name and description, and also add a merchant reference if needed. You can also receive a copy of the invoice to your email.
You will be shown a preview of the payment request on the right side of the screen. The invoice from every payment request will remain listed in the Invoices overview for future reference.
Managing your invoice behavior
If using this feature regularly, we recommend that you also have a look at invoice settings to adjust your preferences for invoice expiration, prolonging, and underpayment behavior. You will find these parameters in Settings – Invoice. Read more about Confirmo invoicing and exceptions here.
We hope you found today’s article useful. Read the blog for more guides to get the most out of Confirmo in your business!